If you google search “Schroth Physical Therapy,” you will likely see pictures of people doing exercises on these sleek wooden ladder-looking contraptions. They are called Swedish ladders, or stall bars. These ladders are handmade, sturdy, aesthetically pleasing, and perfect for doing Schroth Physical Therapy … and they are $549. Whomp whomp.
Swedish ladders are lovely, and a small percentage of our SchrothDC patients have purchased these works of art for home use, and they adore them. This post is intended to provide an alternative, so if you don’t have an extra $549 lying around, fret not. Most of our patients improvise by using a $7 door anchor, a $35 pull-up bar, and various bands and props that can mostly be found around the house or purchased from Amazon.
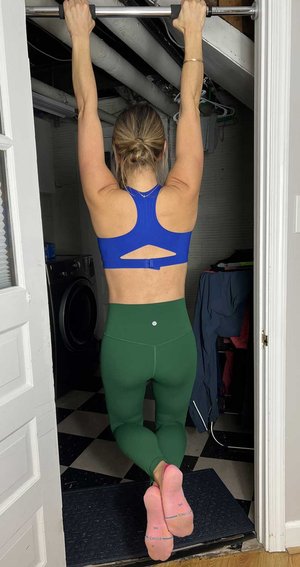
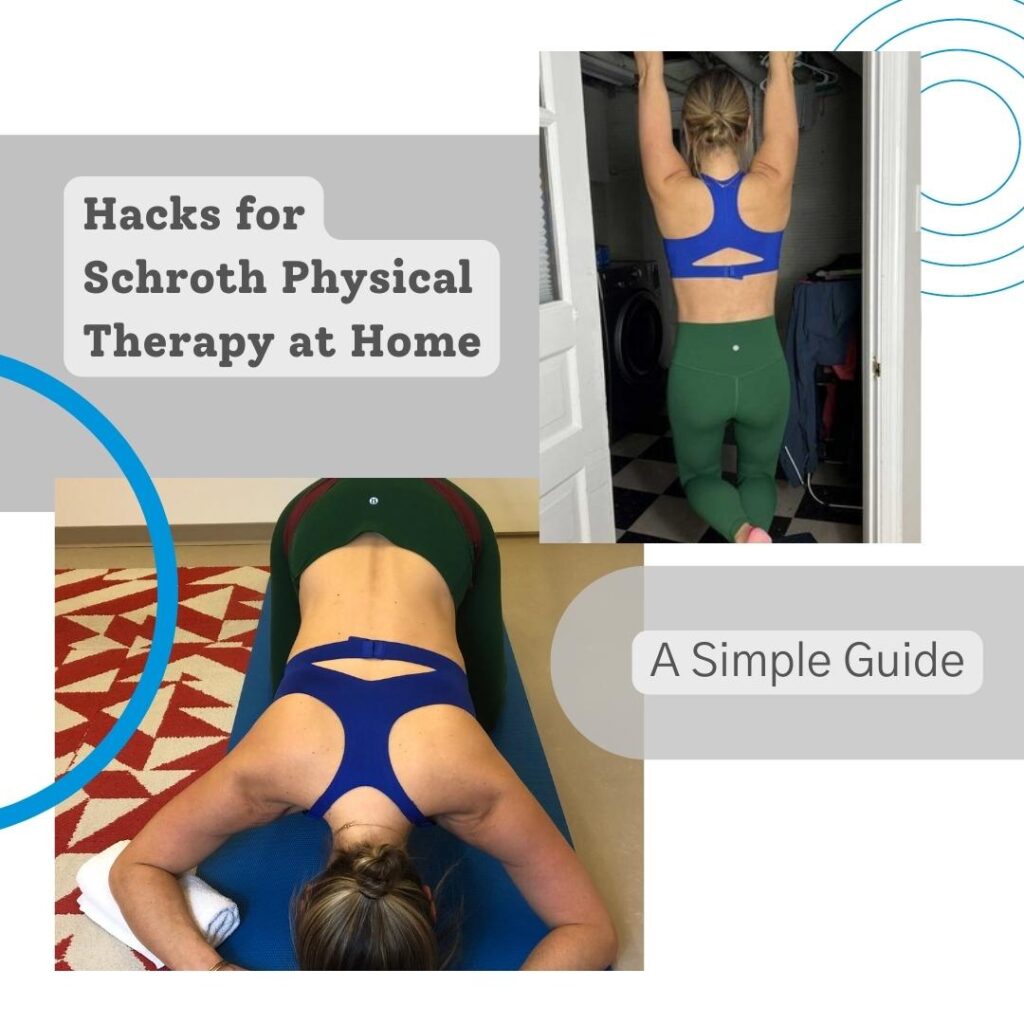
Let’s first talk pull-up bars. Many of our teenage patients and some of our adult patients do a scoliosis-specific exercise called Full-hanging. Full-hanging is wonderful for elongating the spine and decompressing the vertebrae, discs, and nerves. Think of Full-hanging as a very active version of an inversion table. In the clinic, we use the highest bar of our Swedish Ladders, which is slightly offset, for our patients to do Full-hanging. This is perhaps the easiest Schroth exercise to replicate at home with a simple over-the-door or tension-loaded pull-up bar.
There’s one catch: for anyone on the taller side, you’ll have to bend your knees when doing Full-hanging at home from a pull-up bar since doorframes at home are always less high than a Swedish ladder.
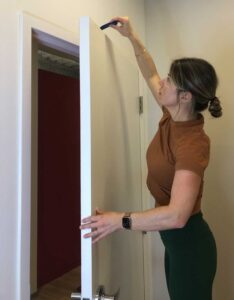
Semi-hanging is a wonderful alternative to Full-hanging. We use this exercise with many of our adults, and some of our teenagers. This is trickier to set up at home but can be done with 3 pieces of equipment: a door anchor, a stretch-out strap, and a 3-foot wooden dowel. The door anchor is designed to slip over the top of a door when open, and “catches” once the door is closed and latched to provide an anchor point. Once in place, the stretch-out strap slides through the door anchor, and the wooden dowel slides through the stretch-out strap at forehead height. You now have a stable bar to do Semi-hanging. IMPORTANT: only use a door anchor on a door that firmly latches shut. We don’t want any at-home Schroth injuries!

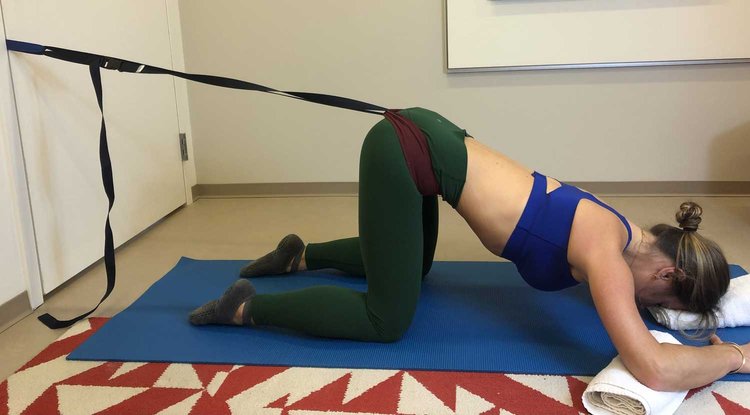
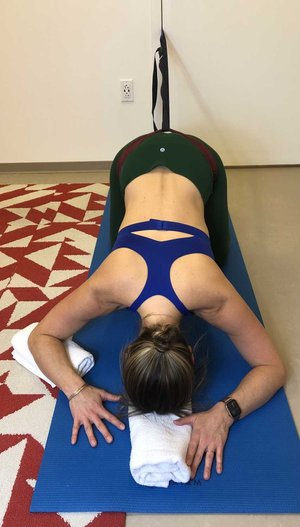
Next up, our scoliosis-specific mat exercises using a traction belt. This is where we truly get creative. When choosing a location at home for these mat exercises, consider the available space in front of the closed door: you’ll need about a yoga mat’s width/length of space to work with. Doors that open into hallways, or doors that have big pieces of furniture in front or behind them aren’t going to provide you with enough space.
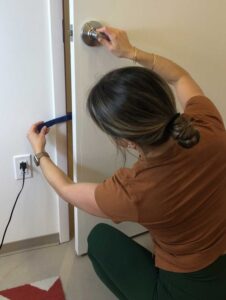
Once you find the ideal space, you’ll need your trusty door anchor again, though this time the door anchor will be going into the side of the door rather than over the top. The height of the door anchor will depend on the exercise: the ideal position for the door anchor is at the height of the pelvis (during the exercise) or slightly above.
Here are approximations for each exercise:
-
Prone on Knees: about 6 inches below doorknob height
-
Supine: 2-3 inches above ground level
-
Sidelying: 8-12 inches above ground level
-
Prone on Stool: 8-12 inches above ground level
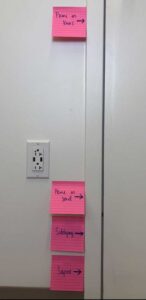
Using small post-it notes on the doorframe to mark the appropriate level for each exercise can be incredibly helpful. It takes the guessing out of where to put the door anchor every time you do your mat exercises, so you can seamlessly transition from one to the next. Once the door anchor is in place, you’ll slide your traction belt through the door anchor to secure it. The second part of the fabric belt will then slide through the traction belt. Now you can secure the fabric belt around your hips, essentially tethering yourself to your door, and begin to position yourself in your exercise. The traction belt is meant to help elongate the spine during exercise.
For Prone on Knees, Supine, Sidelying, and Prone on Stool, you’ll need a variety of props to facilitate a 3-dimensional postural correction. We use rice bags, yoga blocks, yoga mats, an 18” stool, an 8” stool, and 3′ foam rollers. At home, you can substitute rolled hand towels (you’ll need 3-4 of them), a standard chair, and a few thick textbooks.
Last are our Seated and Standing Schroth exercises. These are less complex than the mat exercises we just went through, so bear with me!
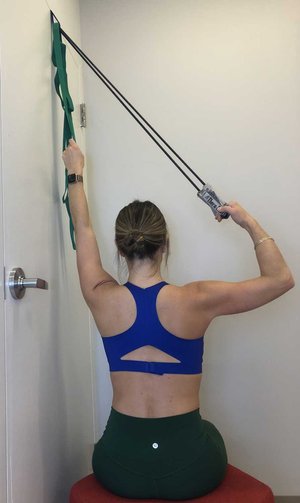
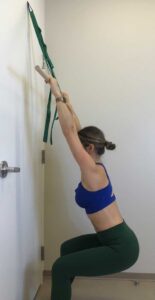
For Seated, the exercise will depend on your curve type. I will describe the Seated exercise for a primary thoracic, or 3C curve type, as it is more complex than for our other curve types. You’ll need your door anchor, stretch-out strap, and a resistance band, preferably with handles.
Place the door anchor over top of the door and lock it into place by closing and latching the door. Slide both the stretch-out strap and the resistance band with handles through the door anchor. Place a chair facing sideways in front of the door, and you’re ready to go.
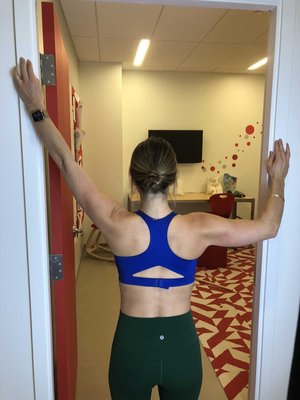
In the clinic, we love using 7-foot tall wooden dowels for our Standing scoliosis exercises, but we know it’s a big ask for patients to buy them for home use. Instead, we have our patients utilize the doorframe for arm positioning and leverage.
Remember, any scoliosis-specific exercise is better than none, so starting small, perhaps with Semi-hanging, is a great step forward. Over time, as you get more comfortable with these complex exercises during your one-on-one sessions with your Scoliosis Physical Therapist, you may be more confident setting yourself up at home.
I’m a big fan of Teddy Roosevelt’s wisdom: “Do what you can, with what you have, where you are.” Look around your cozy abode, find a place, find some props, and start Schrothing.